
Few installation types are requested by homeowners as often as the semi-inground hot tub or swim spa. The shell sits partly in the ground, getting in becomes easy, the look is calm – and the effort stays well below that of a fully inground installation. For landscapers, pool builders and plumbing contractors, semi-inground installation is an attractive project with healthy margins. In this guide, we as the manufacturer INFINITAS show how to plan and carry out a semi-inground installation properly – from the first site visit to the finished deck.
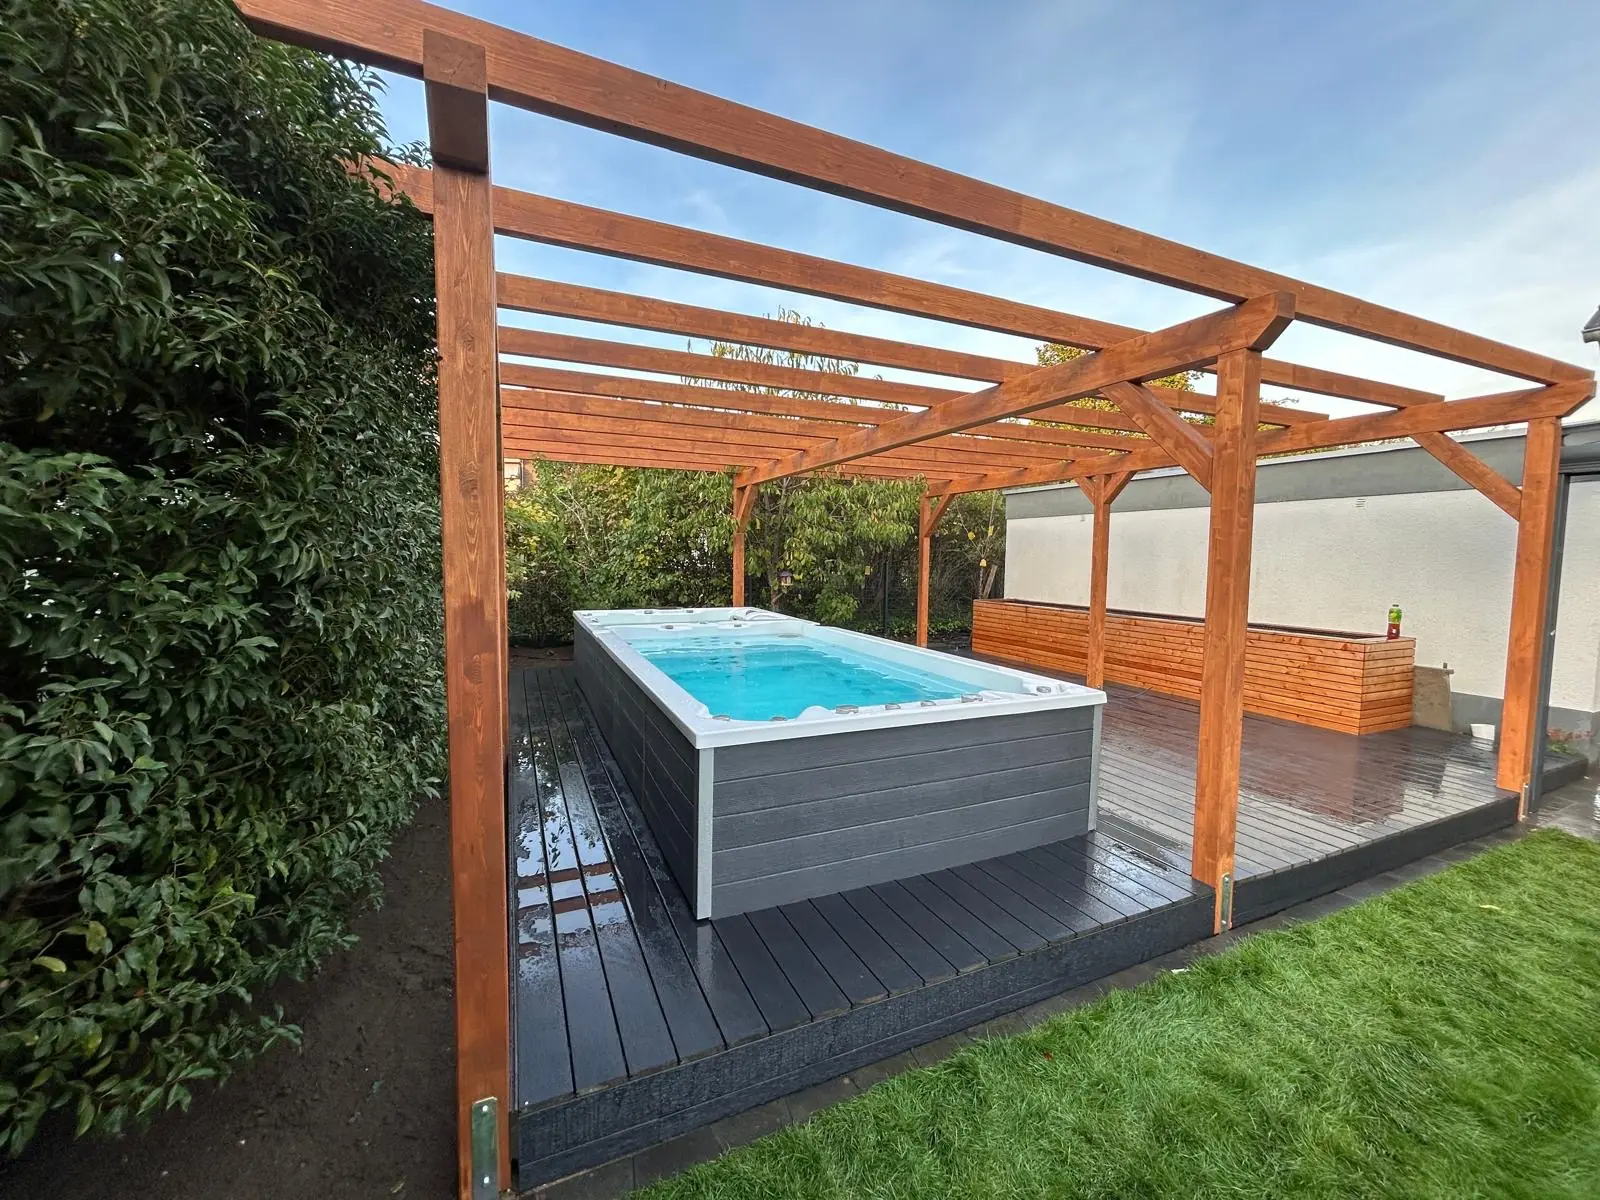
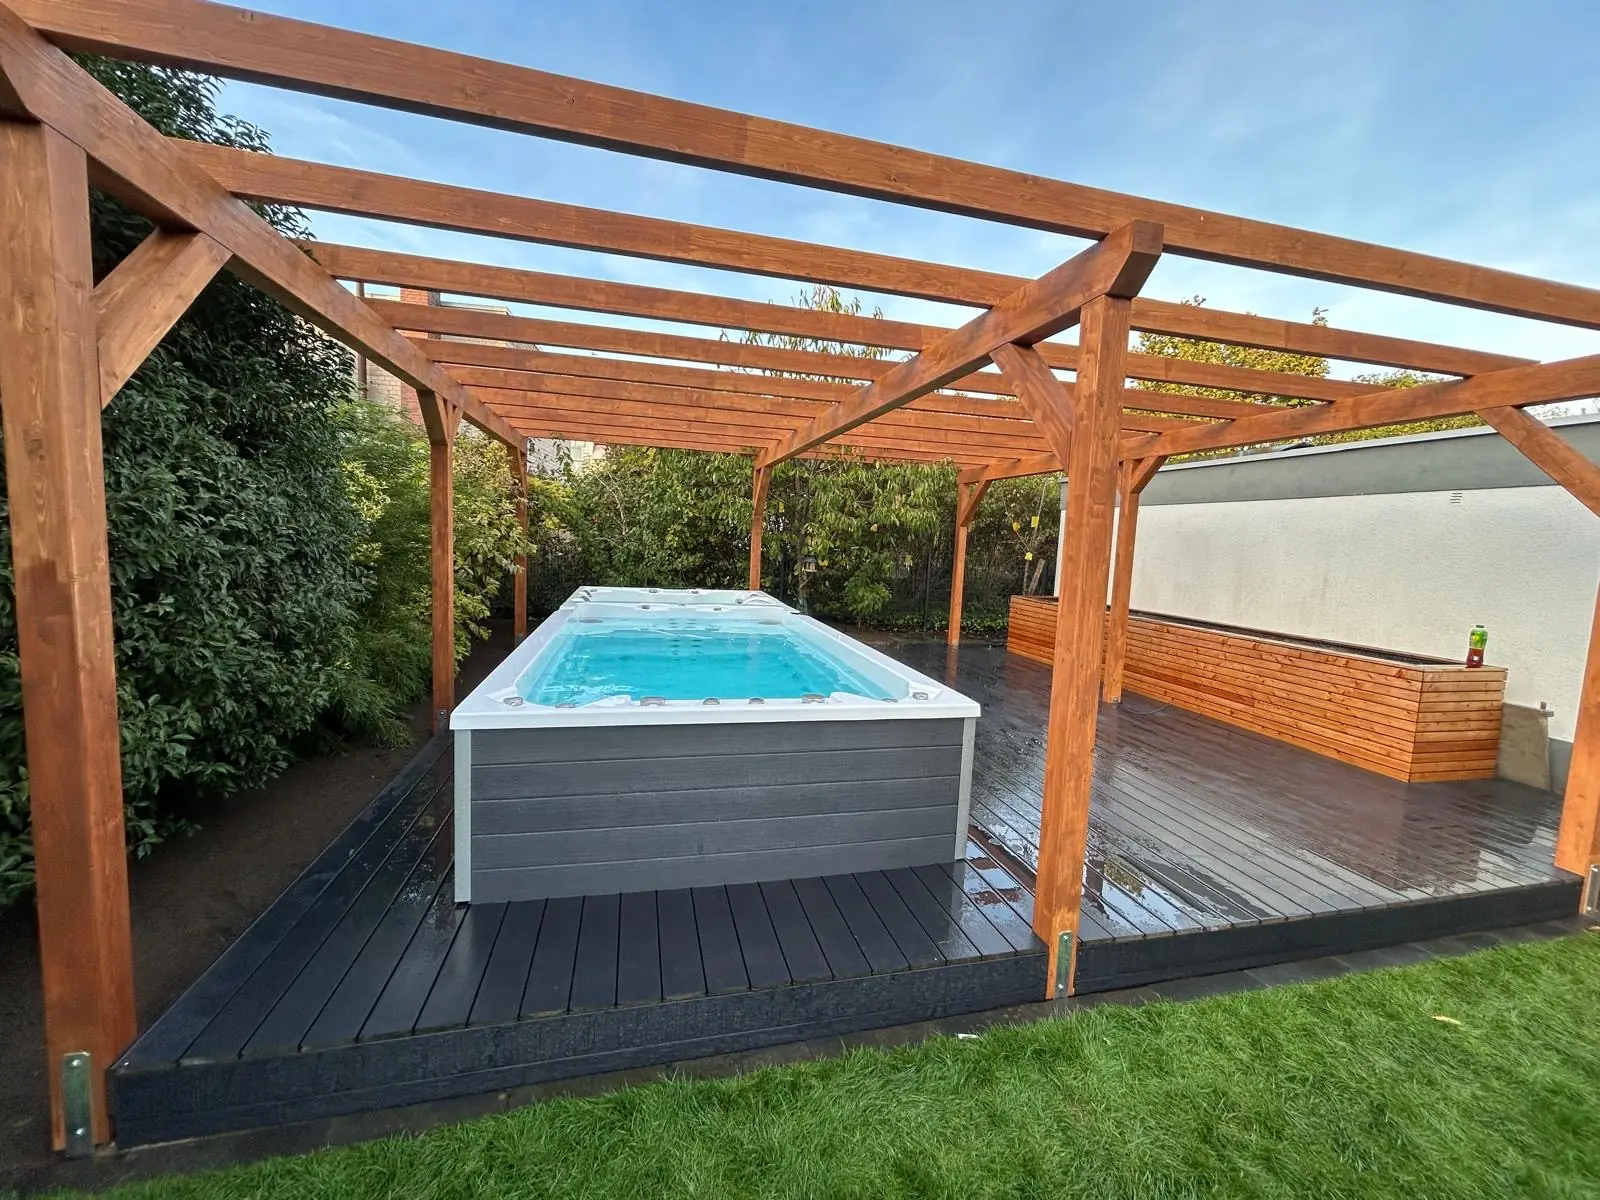
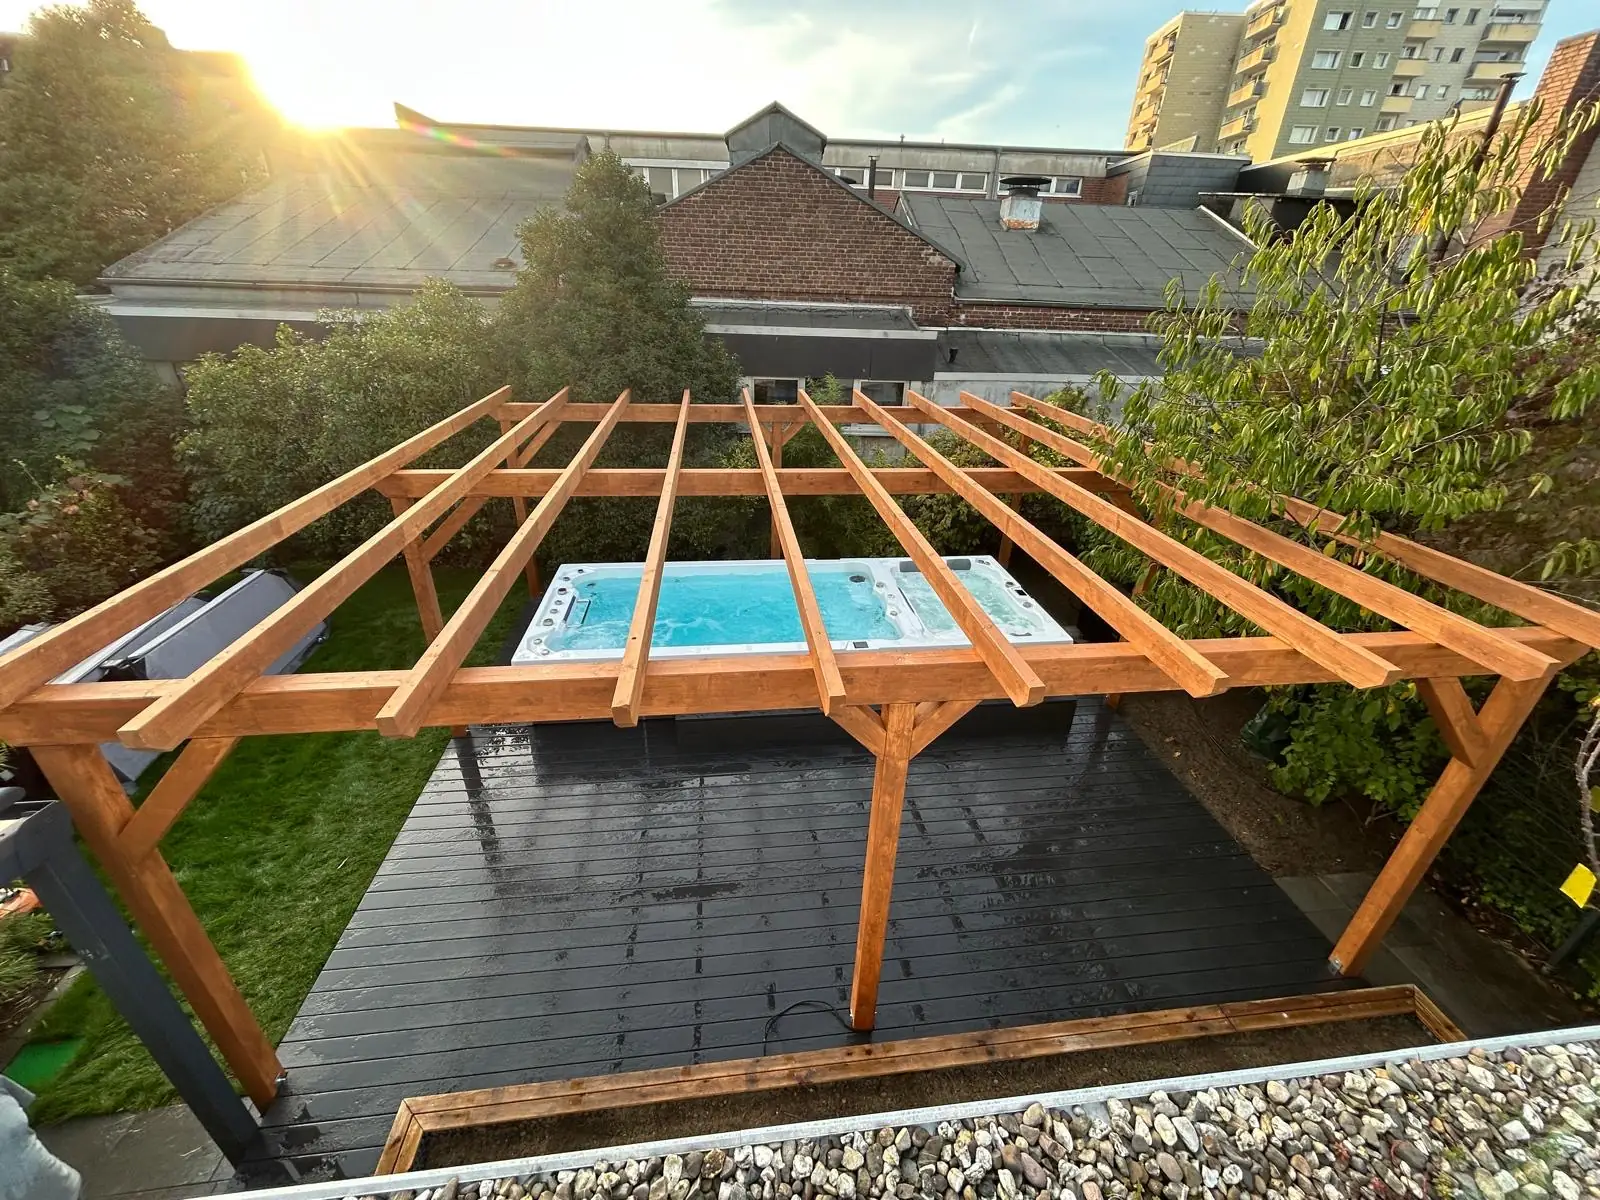
The photos show a real INFINITAS project: a swim spa installed semi-inground in a dark terrace deck under a pergola. The step graphics further down are schematic illustrations.
What does “semi-inground” mean at INFINITAS?
In a semi-inground installation, only part of the shell is set into the ground. At INFINITAS one ratio has proven itself: about 70 cm below ground and about 80 cm above. This brings several advantages: the visible height drops to a comfortable seat and step-in height, the spa looks much flatter and more elegant, and the excavation stays manageable. At the same time, the upper part of the cabinet stays visible, so the spa looks less like a pool and more like a deliberately staged piece of garden furniture.
Important for your sales conversation: every INFINITAS model can be installed semi-inground – from the compact hot tubs of the SE Collection and the MB Collection to the design models of the DSGN Collection and the large swim spas of the SP Collection. You don’t have to hunt for a “suitable” model – combine the installation type freely with the customer’s preferred spa.
The INFINITAS difference: direct backfill
This is the decisive difference from many other manufacturers. Conventional hot tubs and swim spas are built to stand freely. Their cabinet and base are not designed for soil pressing against them from the side. Many manufacturers therefore require a block or concrete pit with a surrounding crawl space for any sunken installation – and explicitly exclude backfilling with soil in their warranty terms.
INFINITAS is different. The lower section of our shells is reinforced from below with ABS plus glass-fibre reinforced plastic (GRP). This allows the sunken part to be backfilled directly with soil. A surrounding concrete tank or inspection corridor is not needed for semi-inground installation. For your quote, that means less concrete, less formwork, less labour – and a price that is far more attractive to homeowners than a classic pit solution.
- ABS underside: protects the shell from below against moisture and mechanical stress.
- GRP reinforcement: takes the lateral soil pressure in the sunken area.
- Result: direct backfill with suitable material, no surrounding concrete wall.
Installer or dealer? Become an INFINITAS partner
Offer your customers semi-inground hot tubs and swim spas that may be backfilled directly – with manufacturer terms, technical drawings and personal project support. Call us on +49 2103 995430 or send us a message.
Semi-inground, fully inground or freestanding – how they compare
Freestanding is the cheapest option, but the spa stands at its full height of often 90 to 100 cm and needs steps. Fully inground is the premium look but means a deep pit, more drainage work and careful planning of service access (with INFINITAS The Grand even without an inspection shaft). Semi-inground is the middle path: a much lower step-in height, a harmonious look, but only a moderate excavation of about 70 cm plus base. For most gardens it is the best combination of impact and budget.
Planning before the first spade hits the ground
A semi-inground installation is no rocket science, but it starts with a careful survey. Clarify these points during the site visit:
- Delivery and placement: How will the spa reach its location? Swim spas cannot be carried on edge; a crane is often needed. Check access, crane standing area and swing radius.
- Buried services: Obtain utility plans for power, water, gas and telecoms before digging.
- Soil conditions: Clay, sand or rock? This determines excavation, drainage and backfill material.
- Groundwater and slopes: A high water table or slope water changes the planning considerably.
- Clearances: To buildings, boundaries and trees (roots!). Observe local regulations.
- Electrical supply: Cable route from the distribution board, cross-section and protection according to the model’s data sheet.
- Permits: Often not required, but rules vary by region – check early.
Request the technical drawings of the chosen model from us for every project. They show external dimensions, weight, equipment location and the recommended dimensions for base slab and excavation.
Step by step: how to install semi-inground
1. Excavation: 70 cm deep, with working space
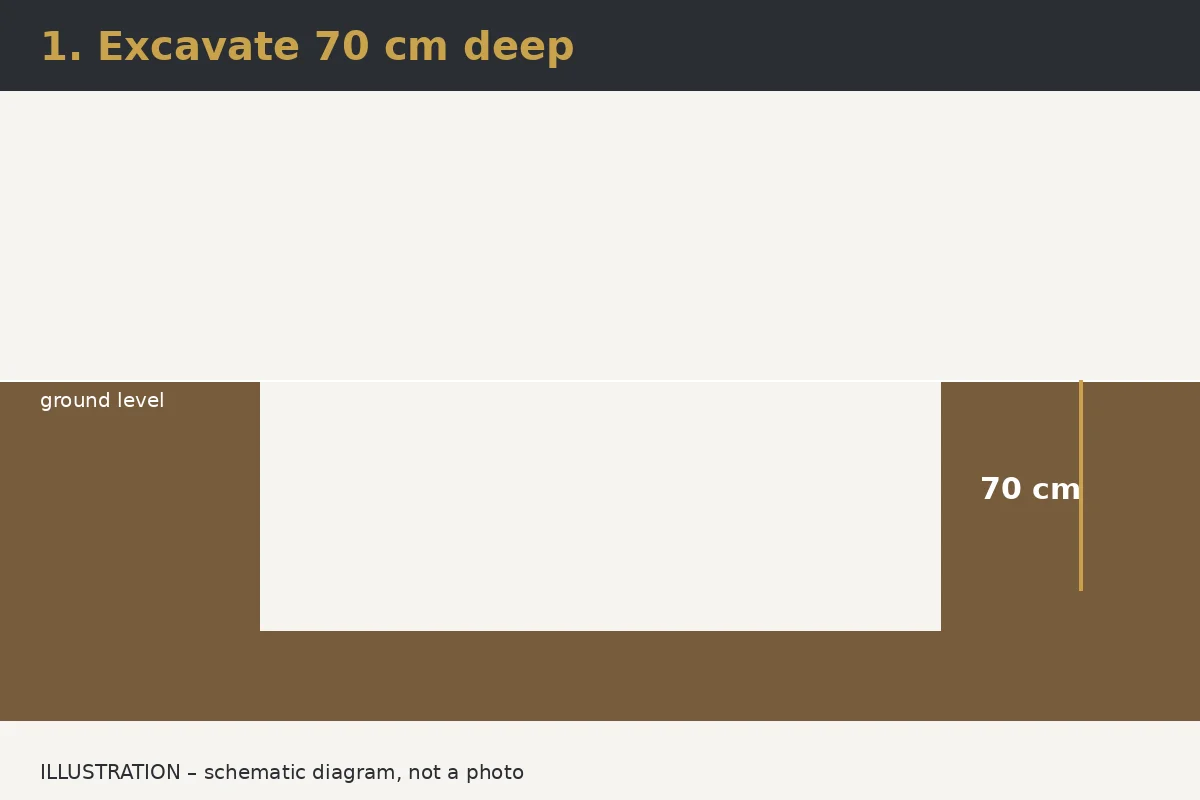
Mark out the external dimensions of the spa and add a working space of about 20 to 30 cm all round. This leaves room for levelling, pipework and later backfilling in layers. The excavation depth is 70 cm installation depth plus the build-up of base slab and sub-base. Make sure the bottom is level and compacted, and stockpile the spoil so that suitable material can be reused later. Secure the sides if the soil is unstable.
2. Sub-base, drainage and base slab
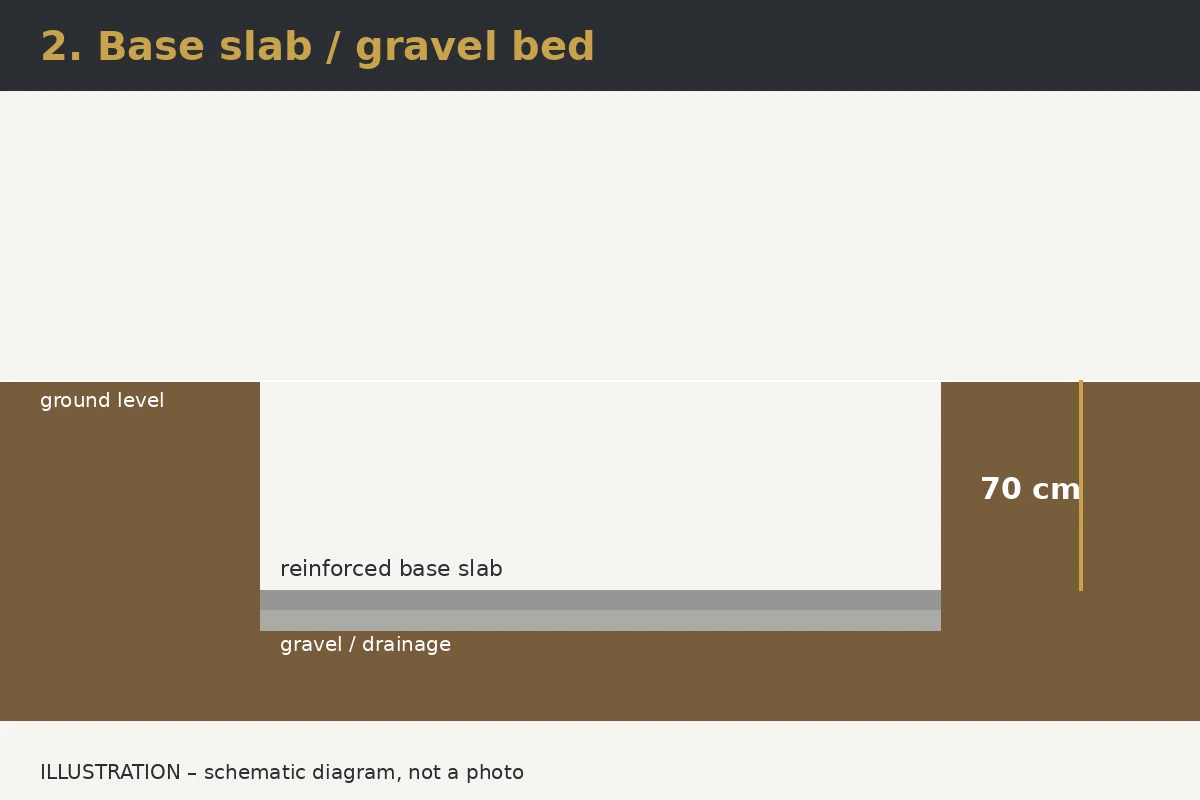
The base carries the full weight of spa, water and bathers – quickly ten tonnes and more for a swim spa. A compacted gravel bed as a frost-proof sub-base with a level, reinforced concrete slab on top has proven itself. Loose paving slabs, sand or chippings alone are not enough as they can settle. Lay a drain in the gravel bed that reliably removes water – into a soakaway, a sewer (where permitted) or a sump with a float switch. The slab must be perfectly level; the spa is supported over its full surface, not on points.
3. Lift in and level the spa
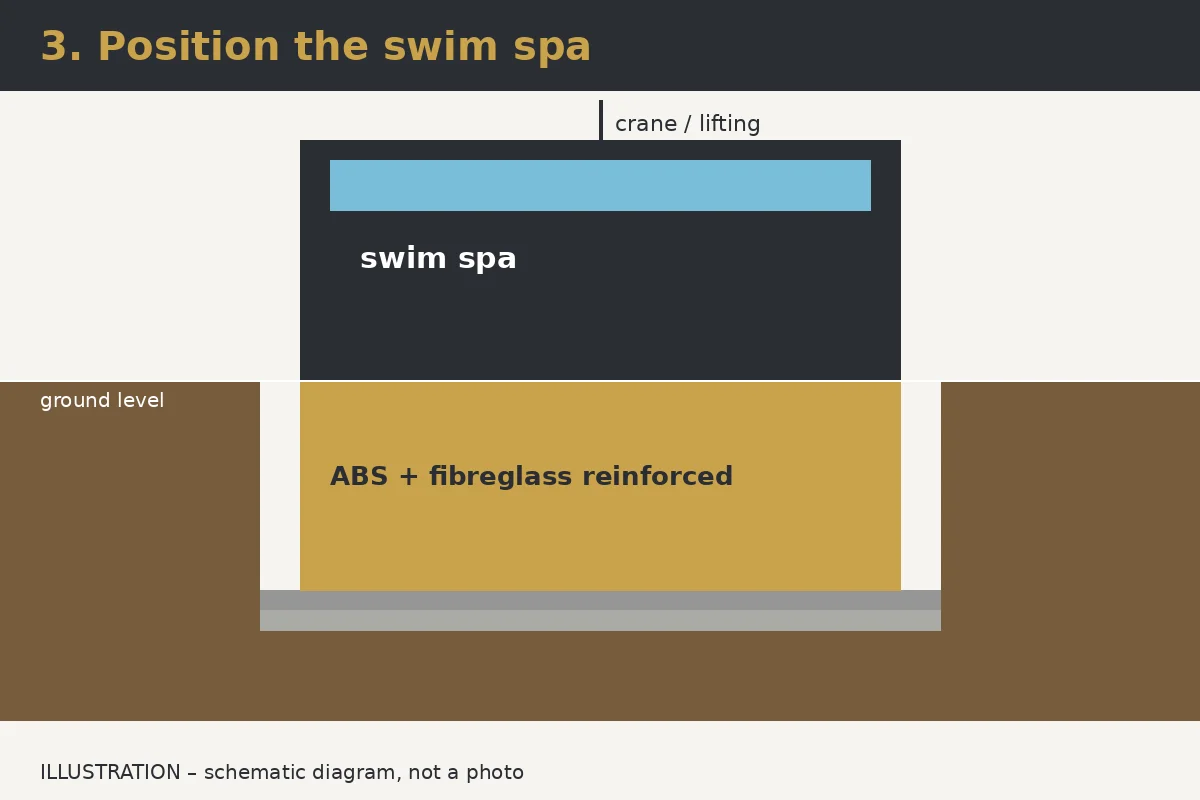
The spa is set into the pit by crane or suitable lifting gear. Never lift or suspend it by the acrylic lip. After setting it down, check level lengthwise and crosswise. Confirm that the top edge sits about 80 cm above the finished ground level as planned and that the service side faces the planned access.
4. Connections and test run
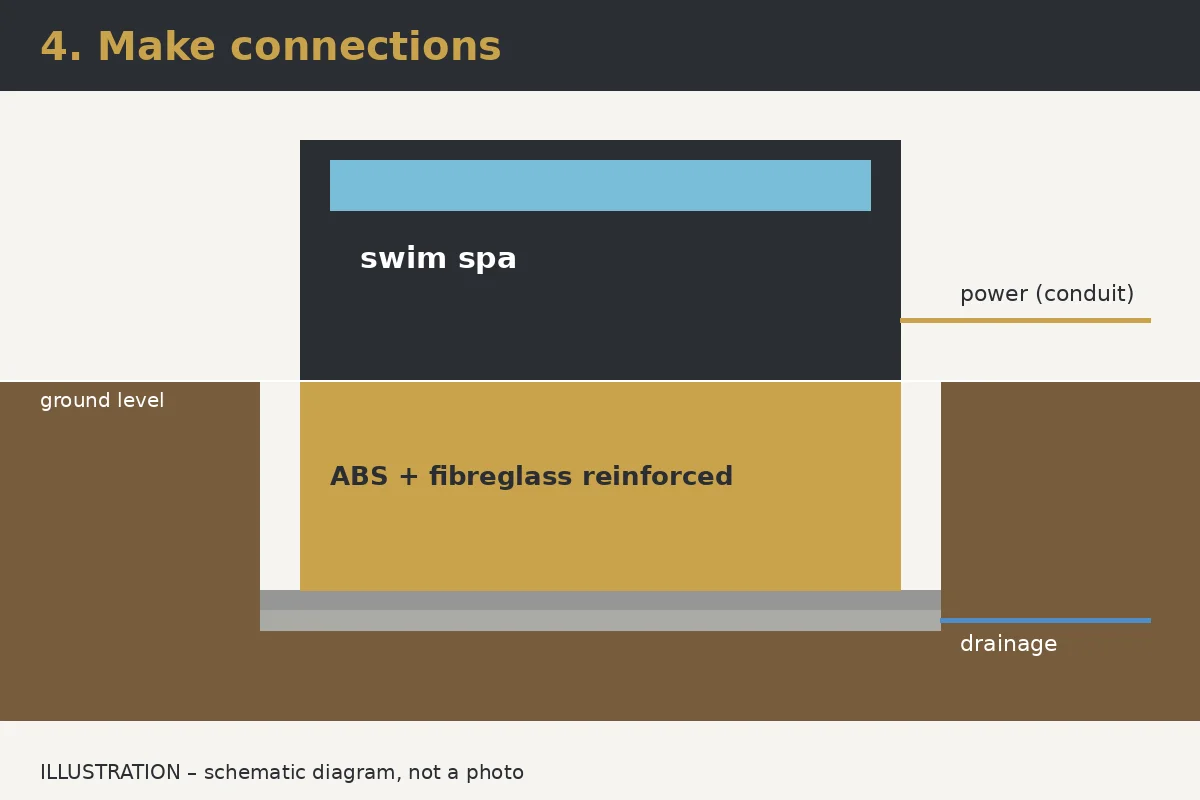
The power cable is laid frost-free in a conduit and connected by a qualified electrician – with RCD protection and fusing per the data sheet. Then fill the spa and run it for at least 24 to 48 hours. Check all unions, pumps and the heater for leaks while everything is still freely accessible. Only backfill once the test run is clean.
5. Backfill against the ABS/GRP reinforcement
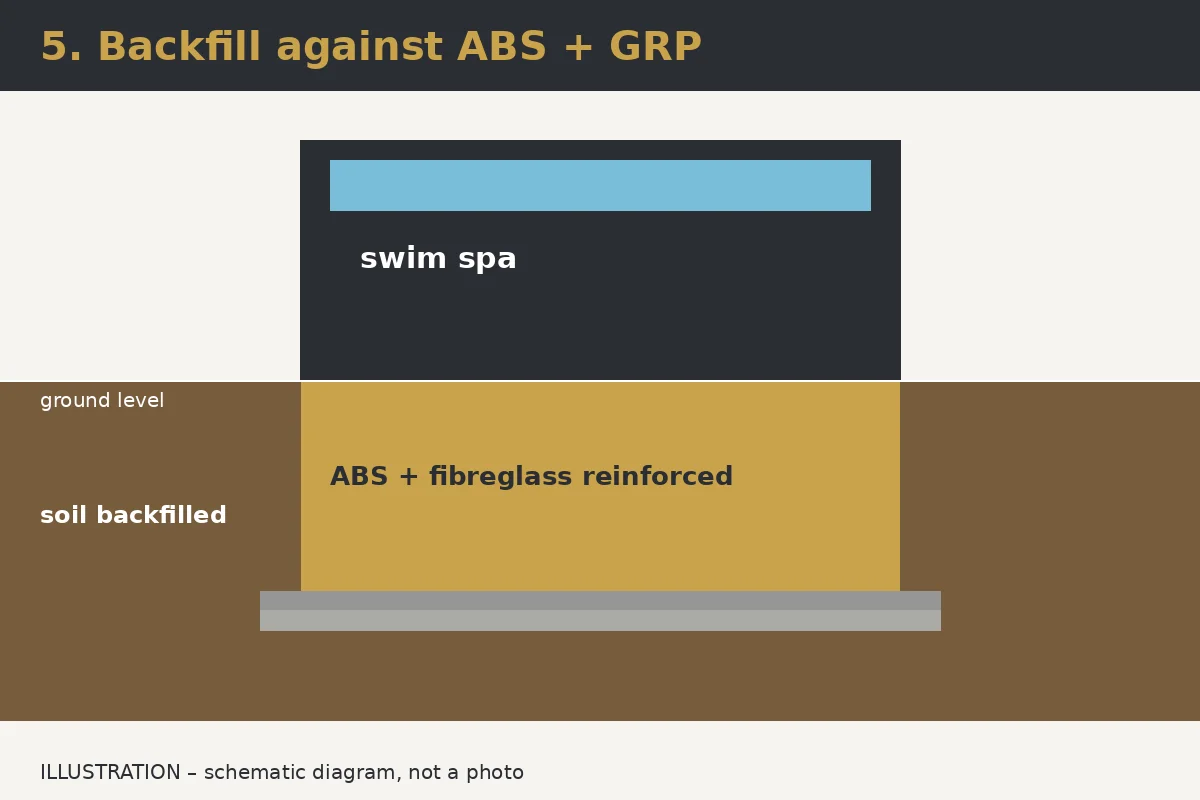
Now the INFINITAS advantage comes into play: the sunken area is backfilled directly. Use well-compactable, stone-free material – for example a sand-gravel mix or fine crushed stone. Place it in layers (about 20 to 30 cm each) and compact gently by hand or with light equipment, evenly on all sides. Backfill with the spa filled so that internal and external pressure stay balanced. Avoid sharp stones, rubble or heavy compactors right next to the shell.
6. Deck, surface and finishing
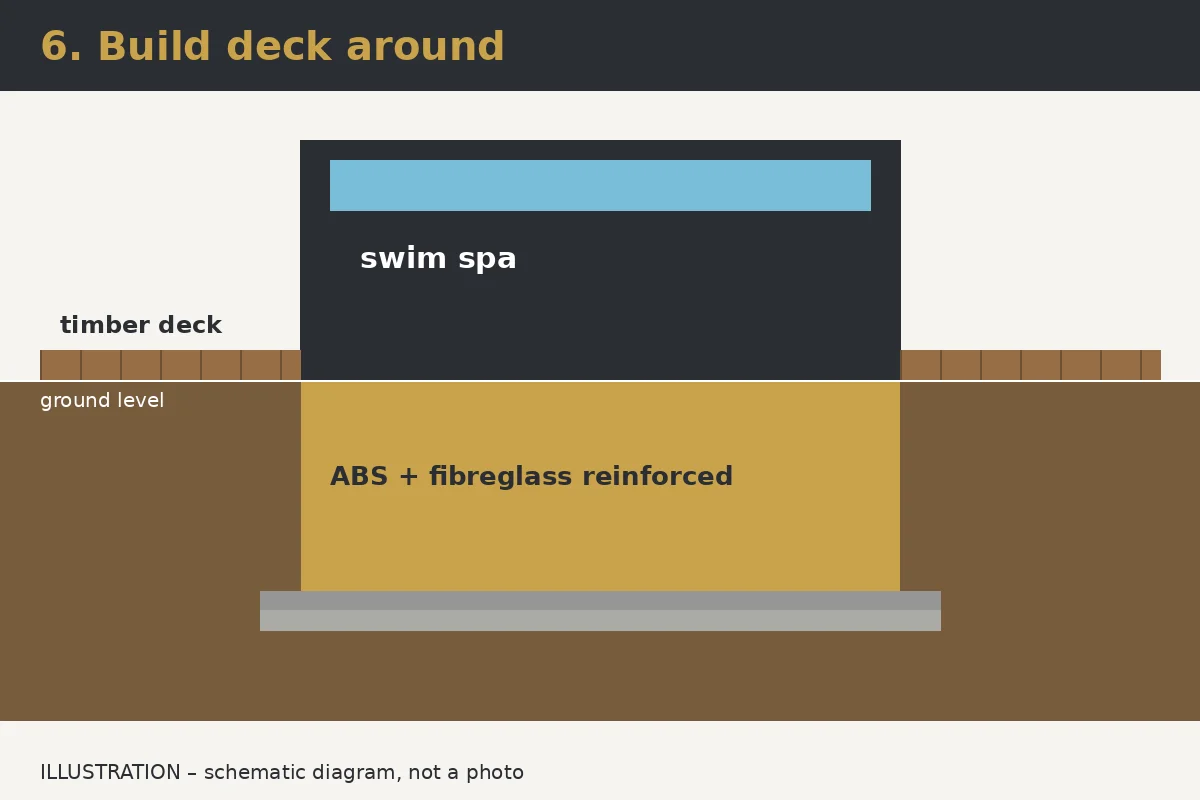
Now the visible surround is created around the spa: timber or composite deck, natural stone or porcelain tiles. The substructure is self-supporting and does not bear on the spa. Plan a removable cladding or deck boards in the equipment area so that service can later reach pumps and controls easily. A slight fall away from the spa drains rain and splash water.
7. Done: 70 cm below ground, 80 cm above
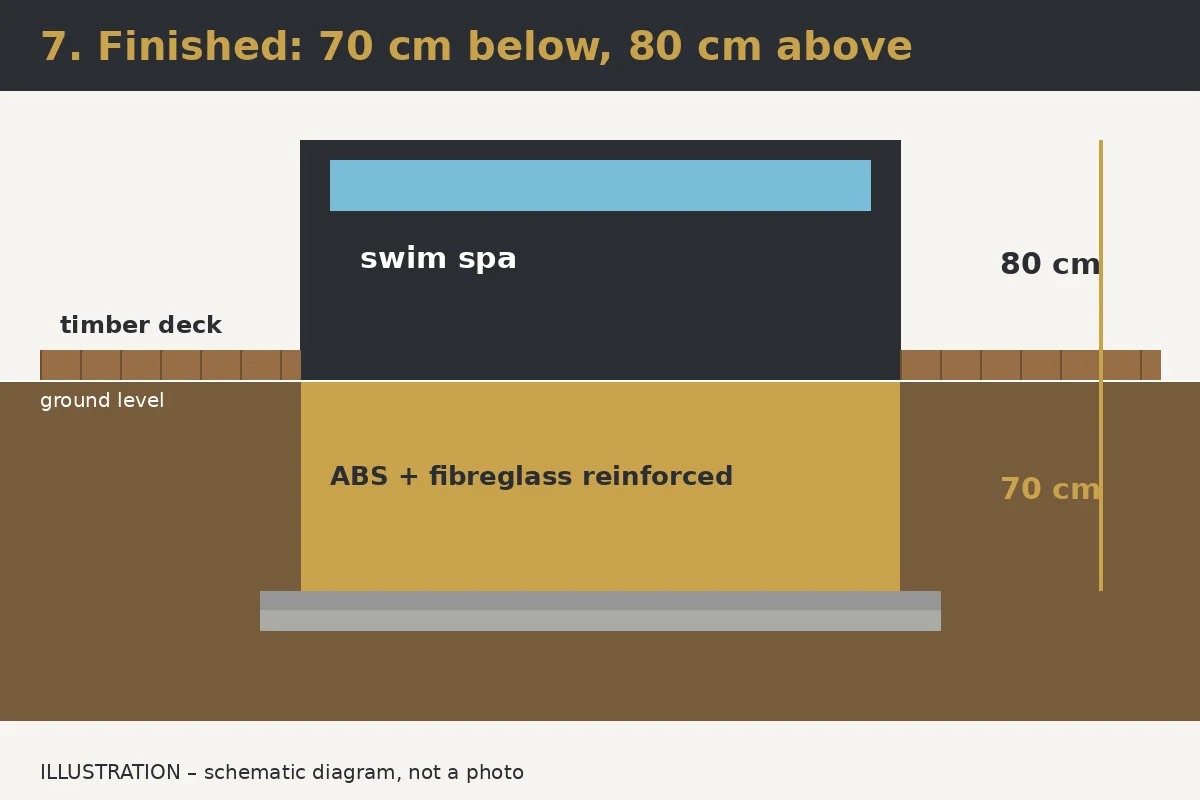
The result: the spa sits about 70 cm in the ground with a visible height of about 80 cm. With a deck or steps, getting in becomes a comfortable sit-and-slide. Hand over the owner’s manual, explain water care and the cover, and document the installation with photos – also for your own references.
Drainage and groundwater: the most common planning mistake
A semi-inground spa is the lowest point in its surroundings. Where water cannot drain away, it collects – around the spa and in the base. That is why drainage is not a “nice to have”. In permeable soils, a gravel bed with a drain pipe is often enough. In heavy clay or with slope water, we also recommend a sump with a float switch. With high groundwater, get a soil survey before digging: an empty shell can experience uplift as the water table rises. Plan never to leave the spa empty for long, and discuss this openly with the customer.
Frost protection and year-round use
INFINITAS hot tubs and swim spas are designed for year-round use. Semi-inground installation adds a benefit: the soil acts as insulation and reduces heat loss through the side walls. What matters is a frost-proof foundation – a sufficiently thick, compacted gravel sub-base under the slab – and frost-free routing of all lines. In winter, the spa ideally keeps running; the controller’s frost protection mode protects the equipment. Never leave a sunken spa empty in winter.
Electrical: planned properly, operated safely
Electrical work always belongs in the hands of a qualified electrician. Plan a dedicated supply from the sub-distribution board with the cross-section stated in the data sheet, an all-pole isolator within sight and an RCD. Lay the cable in a protective conduit in the ground so it can be replaced later. Add a second spare conduit for lighting, smart home or a heat pump right away.
Service access: think about it in semi-inground installs too
Because about 80 cm of the cabinet stays visible in a semi-inground installation, access to the equipment is much easier than with a fully sunken spa. Still: build deck and cladding so that the service side can be opened without a major dismantling job. The exact position of the components is shown in our technical drawings. We ship spare parts centrally from Hilden, Germany – quickly and directly to our partners.
Costs and pricing for installers
The cost of a semi-inground installation is made up of excavation and disposal, gravel and base slab, drainage, crane, electrical connection, backfill material and deck. Thanks to direct backfill, INFINITAS removes the most expensive items of a classic pit: concrete walls, formwork and inspection corridor. That often shortens the build by several days. Price the deck as a separate trade – this is often where much of the added value and customer delight is created.
Typical mistakes and how to avoid them
- Backfilling before the test run – leaks are only discovered later.
- Missing or undersized drainage – water builds up in the base.
- Rubble or coarse stones in the backfill – point loads on the shell wall.
- One-sided, overly heavy compaction – the spa can shift.
- Deck resting on the spa rim – stress in the acrylic.
- No spare conduit – later cable work gets expensive.
Case study: semi-inground swim spa under a pergola
The project in the photos above shows what semi-inground installation makes possible. The customer wanted a swim spa that would blend into an existing terrace with a pergola without looking out of place. A fully inground installation was ruled out because of the effort and the position of the house connections; freestanding, the spa would have been too dominant at almost one metre high. The solution: semi-inground, about 70 cm below ground and about 80 cm above, framed all round by a dark deck. The pergola protects against leaves and sun, and lighting in the deck creates atmosphere in the evening. With swim spas and their great length in particular, the reduced height makes a huge visual difference – the spa looks like part of the architecture.
For the installer, the project was easy to plan: excavation, gravel, base slab and drainage in a few days, lifting in by crane in one morning, then the test run, backfill and deck construction. The expensive items of a concrete pit with crawl space were dropped entirely – thanks to the ABS and GRP reinforcement in the lower section.
Design: making a semi-inground installation look premium
A semi-inground installation lives from its surround. You can stage the visible 80 cm or so in different ways:
- Surrounding deck at mid-height: A raised platform around the spa turns 80 cm into a comfortable seat height. Ideal with integrated steps and LED strips.
- Natural stone or gabion wall: A surround of natural stone, gabions or fair-faced concrete looks high-end and lasts – especially in sloping gardens.
- Visible cabinet as a design feature: INFINITAS cabinets look good enough to stay visible. With a custom RAL shell colour, the spa becomes a statement.
- Planting: Grasses and low perennials on the outside soften the transitions. Keep strong-rooted trees at a distance.
- Roofing: A pergola, louvred roof or sail extends the season and protects the cover.
Important in your consultation: show the customer visualisations or reference photos early. Many homeowners only know freestanding or fully sunken spas – semi-inground is often the surprisingly elegant solution that doesn’t break their budget.
Project timeline with the homeowner
A structured process builds trust and protects your margin. This has proven itself in practice:
- Week 1: Initial meeting, model selection in the showroom or online, site visit with measurements and photos.
- Week 2: Quote with clearly separated items for spa, groundwork, base, electrical, crane and deck.
- Weeks 3–6: Order, delivery time, in parallel permit questions and electrical planning.
- Build phase (approx. 1–2 weeks): Excavation, base, lifting in, connections, test run, backfill, deck.
- Handover: Instruction, water care starter kit, offer a service contract.
A service contract is a valuable building block for you as an installer: it secures recurring revenue and keeps you in touch with the customer – for accessories, filters, chemicals and future referrals.
Why INFINITAS for installers?
INFINITAS is the own brand of Spa Natural from Hilden, Germany. We develop hot tubs and swim spas that are suitable for demanding installation situations from the outset – semi-inground, fully inground without an inspection shaft, or freestanding. As a partner you benefit from:
- manufacturer terms and clear territory support
- technical drawings, installation notes and personal project advice
- spare parts supplied centrally from Germany
- marketing material, photos and copy for your website
- special requests such as custom RAL colours and individual branding
In semi-inground installation in particular, direct backfill is a sales argument that clearly sets you apart from the competition: you can offer a premium look at a price that others can hardly match with a concrete pit.
Site checklist
- Technical drawing of the model available
- Utility plans checked, access and crane position clarified
- Excavation 70 cm plus base, 20–30 cm working space all round
- Gravel sub-base compacted, drainage laid
- Reinforced base slab level and cured
- Conduits for power and additional lines laid
- Spa levelled, top edge about 80 cm above ground
- Test run 24–48 h without issues
- Backfilled in layers with stone-free material
- Deck self-supporting, service side removable
- Handover with instruction and photo documentation
Hot tub or swim spa: differences in semi-inground installation
The principle is the same for both, but the dimensions differ considerably. A hot tub from the SE or MB collection puts a few tonnes on the slab when filled and in use; a swim spa from the SP collection several times that. Base slab, reinforcement and sub-base must be designed accordingly – always follow the data sheet and have a structural engineer calculate if in doubt.
Logistics differ too: a hot tub can sometimes be moved into place with a pallet truck and spa dolly; a swim spa almost always needs a crane. Plan more working space along the long sides of swim spas, because levelling a five- to six-metre shell requires more room to move. When backfilling long shells, work especially evenly: several thin layers on all sides are better than one thick layer on one side.
Visually, the swim spa benefits most from semi-inground installation. A freestanding swim spa is a large structure in the garden; semi-inground, its perceived height almost halves and it blends calmly into the terrace or lawn.
Safety and cover
A semi-inground spa is easier for children to reach than a freestanding one. A lockable thermal cover is therefore mandatory and should always be closed when the spa is not in use. Plan a cover lifter or enough storage space on the deck. Slip-resistant surfaces at the entry, clearly visible steps and subtle lighting increase safety in the evening. Also check whether local regulations require additional fencing.
Water care and maintenance in a sunken spa
Semi-inground installation does not change water care – the spa works exactly as when freestanding. One advantage: embedded in the ground, the water temperature fluctuates less and the heater works more efficiently. Make sure no dirt from lawn or beds is carried into the water; a surrounding deck or paving helps. When changing the water, the spa is drained with a submersible pump – plan where the water goes, and leave the spa empty only briefly, especially with high groundwater.
More inspiration
Real examples of semi-inground and fully inground projects, custom colours and individual branding can be found on our page Custom Projects & Installation Options and in our references. Our parent company Spa Natural offers an overview of outdoor hot tubs and swim spas for homeowners.
Frequently asked questions
How deep is an INFINITAS hot tub installed semi-inground?
A proven ratio is about 70 cm below ground and about 80 cm above. The sub-base and base slab under the spa come on top of that.
Which INFINITAS models can be installed semi-inground?
All INFINITAS models – hot tubs of the SE, MB and DSGN collections as well as the swim spas of the SP collection.
Can an INFINITAS spa be backfilled directly with soil?
Yes. The lower section is reinforced from below with ABS and GRP and can therefore be backfilled directly – with stone-free, compactable material placed in layers. The warranty remains valid provided the installation follows the INFINITAS installation instructions supplied with your order.
Do I need a concrete pit for a semi-inground installation?
No. You need a load-bearing reinforced base slab on frost-proof gravel and drainage. Surrounding concrete walls are not needed.
Which material is suitable for backfilling?
A well-compactable, stone-free sand-gravel mix or fine crushed stone, placed in layers and compacted evenly.
What about groundwater?
With high groundwater, a soil survey is advisable, plus drainage and possibly a sump. The spa should not be left empty for long.
How does the equipment stay accessible?
About 80 cm of the cabinet stays visible. Deck and cladding on the service side are planned to be removable.
Your next project: semi-inground with INFINITAS
Planning a semi-inground installation or want to add INFINITAS to your range? We send you technical drawings, advise on base and connections and support you on your first project. Phone: +49 2103 995430.